You’ve done it a hundred times: ordered a perfectly seared steak at a steakhouse, marveled at the deep mahogany crust contrasting with the rosy interior, paid $60 for the privilege. Then you go home, buy an expensive ribeye, follow a recipe… and end up with a gray, steamed piece of meat that tastes nothing like what you just paid for.
The frustrating truth? It’s not the quality of your steak. It’s not even your technique, necessarily. It’s a handful of specific mistakes that prevent home cooks from achieving that restaurant crust, mistakes that are entirely fixable once you understand what’s actually happening in that pan.
Let’s decode exactly how steakhouses get that perfect sear, and more importantly, how you can replicate it in your home kitchen tonight.
Understanding the Maillard Reaction
That beautiful brown crust on a perfectly seared steak isn’t just aesthetically pleasing, it’s a complex chemical reaction called the Maillard reaction, named after French chemist Louis-Camille Maillard. When proteins and sugars are exposed to high heat (above 300°F), they undergo a transformation that creates hundreds of new flavor and aroma compounds.
This is fundamentally different from caramelization (which involves only sugars) or charring (burning). The Maillard reaction is what makes seared meat taste like seared meat—that savory, complex, almost nutty flavor that we associate with perfectly cooked steak.
But here’s the critical detail most home cooks miss: the Maillard reaction requires three things to occur properly: high heat, dry surface, and time without movement.
Miss any one of these, and you get steamed, gray meat instead of a gorgeous crust.
The Single Biggest Mistake: Wet Meat
This is the killer. If your steak’s surface is wet, you cannot get a proper sear. Period.
Why restaurants get this right: Commercial kitchens age beef in temperature and humidity-controlled environments. By the time steak hits the grill, the exterior is dry. They also pat steaks dry immediately before cooking and often let them sit at room temperature, which allows surface moisture to evaporate.
Why home cooks get it wrong: You take steak out of the plastic-wrapped package (which has been sitting in its own juices), maybe give it a cursory pat with a paper towel, and throw it in the pan. All that surface moisture has to evaporate before browning can even begin. By the time the surface is dry, you’ve overcooked the interior.
The fix:
- Remove steak from packaging 1-2 hours before cooking. Place on a wire rack over a plate in the refrigerator, uncovered. This air drying step is transformative.
- If you’re short on time, at minimum pat the steak aggressively dry with paper towels. We’re not talking about a gentle blot, really press those towels into the meat to absorb every bit of moisture.
- Let steak sit at room temperature for 30-45 minutes before cooking. This serves two purposes: it allows more surface moisture to evaporate, and it ensures even cooking (more on this later).
Heat: Higher Than You Think
Home cooks are timid with heat. Restaurants are not.
What restaurants do: Commercial ranges produce 15,000-25,000 BTUs per burner. Professional broilers hit 700-900°F. When a steakhouse sears your ribeye, they’re using equipment that generates serious heat.
What home cooks do: Use medium-high heat because that’s what the recipe says. Your burner produces maybe 7,000-10,000 BTUs. You’re already starting with less firepower, and then you’re not even using maximum heat.
The fix:
- Preheat your pan for 5-7 minutes on high heat. Not medium-high. High. Let it get ripping hot. You should see wisps of smoke when you add a tiny drop of oil.
- Test heat level: Flick a few drops of water into the pan. They should immediately ball up and skitter across the surface like ball bearings. If they slowly sizzle and evaporate, the pan isn’t hot enough.
- Use a heavy pan. Cast iron, carbon steel, or thick stainless steel retain heat better than thin pans. When you add cold steak to the pan, a heavy pan recovers its temperature quickly. A thin pan loses heat and you end up steaming the meat.
- Don’t cook more than 2 steaks at once in a 12-inch pan. Overcrowding drops the pan temperature dramatically.
The Right Fat for High Heat
Not all cooking fats are created equal, and this matters enormously at the high temperatures required for searing.
What restaurants use: Clarified butter, grapeseed oil, or refined vegetable oils with smoke points above 400°F. Many high-end steakhouses finish with whole butter, but they sear with high smoke-point fats.
What home cooks do: Use olive oil (smoke point 375°F) or butter (smoke point 350°F) from the start, which means the fat is smoking and breaking down before you achieve proper searing temperature.
The fix:
- Start with neutral oil: Use avocado oil (smoke point 520°F), grapeseed oil (420°F), or refined vegetable oil (400°F+). These can handle the heat required for proper Maillard browning.
- Add butter at the end if you want butter flavor. Once the sear is achieved, reduce heat to medium, add butter, and baste the steak. You get the best of both worlds.
- Use enough fat: A thin film isn’t sufficient. You want about 1-2 tablespoons of oil in the pan—enough to help conduct heat evenly to the meat’s surface.
Timing and Temperature: The Room Temperature Myth (Sort Of)
You’ve probably heard conflicting advice about whether to bring steak to room temperature. Here’s the nuanced truth:
The real issue isn’t room temperature cooking—it’s preventing a cold center.
What restaurants do: Steaks are held in refrigeration but taken out in batches throughout service. They typically hit the grill/pan after sitting out 15-30 minutes. More importantly, they season well in advance, which draws moisture and seasons throughout.
What home cooks do: Either cook straight from the fridge (leading to overcooked exteriors and cold centers) or leave steak out for hours in the danger zone for food safety.
The fix:
- Let steak sit out 30-45 minutes before cooking. Not longer, food safety matters. This takes the deepest chill off and allows more even cooking.
- For thick steaks (1.5″+), consider reverse searing: cook in a 275°F oven until internal temp hits 115°F, then sear in ripping hot pan for 90 seconds per side. This gives you edge-to-edge pink with perfect crust.
- For thinner steaks, the traditional hot pan method works great if you’ve dried the surface properly.
Don’t Touch the Meat
This is perhaps the hardest instruction for home cooks to follow.
What restaurants do: Place steak in pan or on grill. Leave it. Flip once. Done.
What home cooks do: Place steak in pan. Immediately press it down with spatula. Move it around to check if it’s sticking. Flip it multiple times. Lift it to peek underneath.
Every time you move the steak, you interrupt crust formation and lower the contact temperature.
The fix:
- Place steak in hot pan and don’t touch it for 3-4 minutes. It will release naturally when a crust forms. If it’s sticking, it’s not ready to flip.
- Flip once. That’s it. One flip. Cook second side for 2-4 minutes depending on thickness and desired doneness.
- Resist the urge to press down with your spatula. This squeezes out juices and doesn’t improve contact—a properly preheated pan makes even contact on its own.
Seasoning: When and How Much
The steakhouse salt crust isn’t an accident.
What restaurants do: Season aggressively with coarse salt 40 minutes to 4 hours before cooking. This draws moisture to the surface (which then evaporates), seasons the meat throughout, and creates a dry surface perfect for searing.
What home cooks do: Lightly sprinkle fine table salt right before cooking, which doesn’t have time to penetrate and can create steam.
The fix:
- Use coarse kosher salt or sea salt, not table salt. It adheres better and is easier to control.
- Season 40 minutes before cooking at minimum. Season both sides generously, more than feels comfortable. The salt needs time to work.
- For optimal results: Salt 1-4 hours before cooking, place on wire rack in refrigerator uncovered. This combines dry-aging benefits with proper seasoning.
- Add pepper after searing. Black pepper burns at high heat and becomes bitter. Season with salt before cooking, add fresh cracked pepper after.
The Finish: Basting and Resting
These final steps separate good from great.
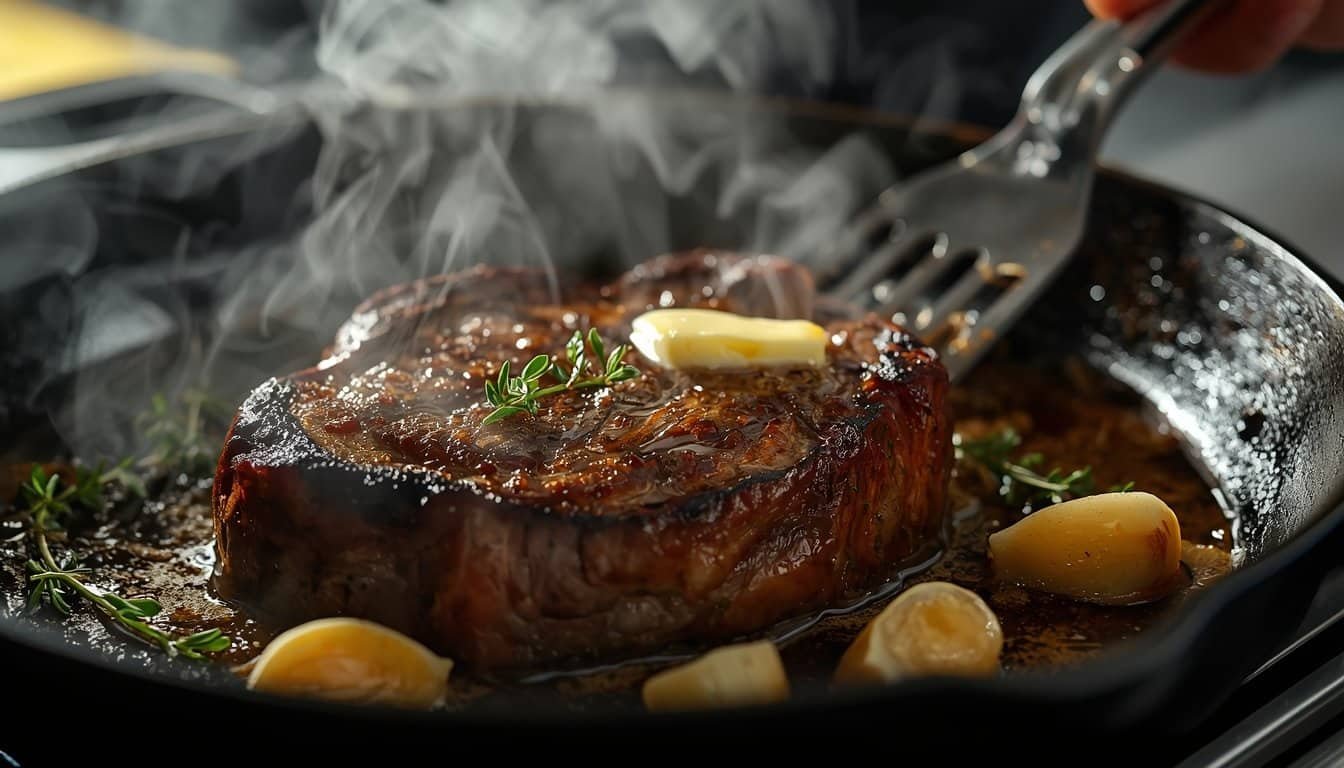
What restaurants do: Baste steak with butter, garlic, and herbs during the final minute of cooking. Let rest 5-10 minutes before slicing. Serve on warmed plates.
What home cooks do: Skip basting, then either don’t rest the meat (juices run everywhere) or rest it so long it gets cold.
The basting fix:
- After flipping, add 2 tablespoons butter, 2 smashed garlic cloves, and fresh thyme or rosemary to the pan.
- Tilt pan so butter pools on one side. Use a large spoon to continuously pour hot butter over the top of the steak for 60-90 seconds.
- This accomplishes two things: adds flavor and helps cook the top surface without flipping again.
The resting fix:
- Transfer steak to a wire rack (not a plate where it sits in its juices) and tent loosely with foil.
- Rest thick steaks 8-10 minutes, thinner steaks 5 minutes. This allows juices to redistribute throughout the meat.
- Don’t rest too long or steak gets cold. If serving multiple people, rest steaks while you quickly sear the next batch,they’ll all come out warm.

The Reverse Sear Method for Thick Steaks
For steaks 1.5 inches or thicker, restaurants often use a combination cooking method, and you should too.
The technique:
- Season steak and place on wire rack over baking sheet.
- Cook in 275°F oven until internal temperature reaches 115°F for medium-rare (about 20-30 minutes depending on thickness).
- Heat pan to smoking hot while steak finishes in oven.
- Sear 90 seconds per side in ripping hot pan with high smoke-point oil.
Why this works: The low oven gently brings the entire steak up to temperature without overcooking the exterior. The final sear is purely for crust—you’re not worried about internal doneness, so you can use extreme heat without fear.
This method produces perfect edge-to-edge pink with a dark crust that rivals any steakhouse.
Choosing the Right Cut
Not all steaks sear equally well.
Best for searing at home:
- Ribeye: Marbling means more fat to baste internally as it cooks
- Strip steak: Leaner than ribeye but great beefy flavor and texture
- Filet mignon: Tender but lean, needs aggressive basting with butter
- Flat iron or hanger steak: Budget-friendly and flavorful
Harder to sear properly:
- Very thick cuts (2″+): Use reverse sear method
- Very thin cuts (under 3/4″): They overcook before developing crust
Thickness matters: For traditional pan searing, 1 to 1.5 inches is ideal. Much thicker and you need reverse sear. Much thinner and it’s too easy to overcook.
Equipment That Makes a Difference
You don’t need professional equipment, but the right tools help.
Essential:
- Cast iron or carbon steel pan: 12-inch is ideal for 2 steaks
- Instant-read thermometer: Guessing doneness wastes expensive meat
- Wire cooling rack: For dry-aging and resting
Helpful but not required:
- Kitchen scale: For precise seasoning (1% of meat weight in salt)
- Infrared thermometer: To verify pan temperature (should hit 450-500°F)
The Complete Restaurant-Quality Sear Checklist
Here’s your step-by-step process:
2-4 hours before:
- Remove steak from packaging
- Season generously with coarse salt
- Place on wire rack in refrigerator, uncovered
45 minutes before:
- Remove steak from refrigerator
- Pat aggressively dry with paper towels
- Let sit at room temperature
Cook time:
- Preheat heavy pan on high heat for 5-7 minutes
- Add high smoke-point oil (1-2 tablespoons)
- Place steak in pan, don’t touch for 3-4 minutes
- Flip once, cook 2-4 minutes depending on thickness
- Add butter, garlic, herbs; baste for 60-90 seconds
- Remove at 125°F for medium-rare (temperature will rise 5° during rest)
- Rest on wire rack 5-10 minutes
- Slice against the grain if applicable, season with fresh pepper
Common Troubleshooting
Problem: Steak is gray, not brown
- Cause: Surface was wet or pan wasn’t hot enough
- Solution: Dry meat better, preheat pan longer
Problem: Smoke alarm going off
- Cause: Pan is hot enough! That’s good. Also, possibly using butter from the start
- Solution: Turn on ventilation, use high smoke-point oil
Problem: Steak sticking to pan
- Cause: Either pan not hot enough, or crust hasn’t formed yet
- Solution: Preheat pan longer. If steak is already in pan, leave it alone. It will release when crust forms
Problem: Perfect crust but overcooked interior
- Cause: Steak was too cold when it hit the pan, or too thick for direct sear
- Solution: Let steak come to room temp, or use reverse sear for thick cuts
Problem: Crust is bitter or acrid
- Cause: Added pepper before cooking and it burned
- Solution: Add pepper after cooking
The Bottom Line
Restaurant-quality steak at home isn’t about access to professional equipment or secret techniques. It’s about understanding the science of searing and eliminating the common mistakes that prevent proper crust formation.
Dry your meat thoroughly. Use genuinely high heat in a properly preheated heavy pan. Don’t move the steak while it cooks. Season in advance. Rest before serving.
These aren’t complicated steps. They’re just different from what most home cooks do instinctively.
The expensive steaks you’re already buying? They’re perfectly capable of developing that dark, complex crust you get at steakhouses. The only thing standing between you and restaurant-quality results is following the actual process that restaurants use – no modifications, no shortcuts, no timidity about heat.
Try this method on your next steak. Follow it exactly. When you cut into that perfectly seared exterior to reveal a rosy, evenly cooked interior, you’ll understand why steakhouses charge $60 and why you don’t need to pay it anymore.